[자바] try-with-resources
[Java] try-with-resources란? try-with-resources 사용법 예시와 try-with-resources를 사용해야 하는 이유
📌 try-with-resources란?
try-with-resources는 Java7 부터 제공하는 기능으로 자바의 InputStream이나 JDBC 연결과 같은 리소스를 자동으로 해제해주는 예외 처리 메커니즘 중 하나이다. try(...)에서 리소스를 열면 try(...)가 종료될 때 블록 내부에서 예외의 발생 여부와 상관없이 열려 있는 모든 리소스를 해제해준다.
AutoCloseable 객체의 close() 메서드는 리소스 사양 헤더에서 객체가 선언된 try-with-resources 블록을 종료할 때 자동으로 호출된다.
사용 후에 반납해줘야 하는 리소스들은 Closeable 인터페이스를 구현하고 있어 사용이 끝나면 close()를 호출해야 한다.
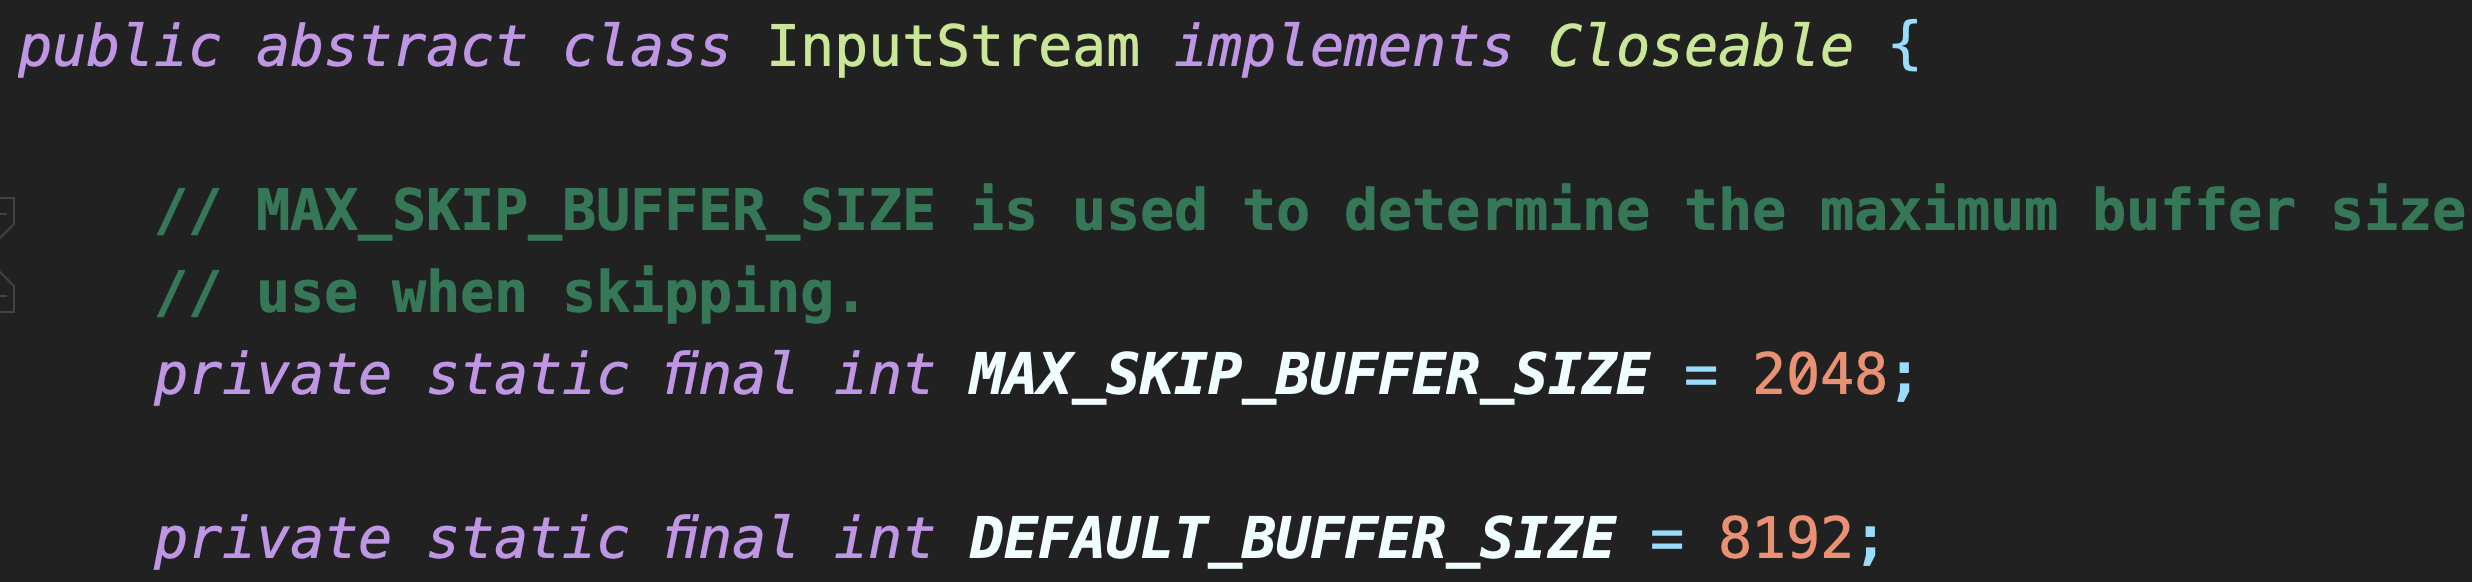
AutoCloseable인터페이스는Closeable인터페이스의 부모 인터페이스다.Cloesable인터페이스에 부모 인터페이스인AutoCloesable을 추가함으로써 먼저 만들어진 기능에 큰 변화 없이 호환성을 유지해 큰 불편함 없이try-with-resources를 사용할 수 있도록 만들었다.
Java7 이전에는 try-catch-finally를 이용해서 자원을 반납해줬는데 어떤 불편함이 있어 try-with-resources가 새로 등장했는지 알아본다.
📌 try-catch-finally로 리소스 반납하기
try-catch-finally의 대표적인 예제로 파일의 내용을 읽는 코드가 존재한다.
import java.io.BufferedInputStream;
import java.io.FileInputStream;
import java.io.IOException;

public class Main {

	public static void main(String[] args) throws IOException {
		FileInputStream is = null;
		BufferedInputStream bis = null;

		try {
			// 예외가 발생할 수 있는 로직
			is = new FileInputStream("file.txt");
			bis = new BufferedInputStream(is);
			int data = -1;

			while ((data = bis.read()) != -1) {
				System.out.print((char)data);
			}

		} finally {
			// 리소스 해제(반납)
			if (is != null) {
				is.close();
			}
			if (bis != null) {
				bis.close();
			}
		}
	}

}
try-catch-finally는 여러 단점을 가지고 있다.
- 리소스 반납에 의해 코드가 복잡해지고 길어진다
- 만약
Exception이 터지면 모든 코드가 실행되지 않을 수 있어 반드시 finally에 개발자가 직접 반납할 리소스를 작성해야 한다 - 리소스 반납 시
null체크가 필요하다
또 블록내에서 return; 이 포함된 상황을 가정해보자
try {
	// 로직
} catch (Exception e) {
	// 예외 처리 로직
} finally {
	// 리소스 해제
}
세 가지 경우의 수가 존재하는데 세 번째 상황에서 문제가 발생한다.
- try 블록 내에
return;이 존재하는 상황: 아무런 예외가 터지지 않고 정상 동작으로 종료되어 finally 구문을 거쳐 정상으로 애플리케이션이 종료된다 - catch 블록 내에
return;이 존재하는 상황: 예외가 터져 catch 블록이 실행되고 예외 처리 로직이 진행된 후 finally 구문을 거쳐 종료된다 - finally 블록 내에
return;이 존재하는 상황: 정상 종료를 의미 하는 return 때문에 try 블록 내에서 예외가 터져도 발생한 예외가 무시되고 정상 종료된다. 즉, 예외가 발생했지만 발생하지 않은 상황으로 간주된다.
try 블록 안에 return은 임시 변수에 결과 정보를 담아 두었다가 finally 블록이 실행된 후 임시 변수 정보를 반환한다. 만약 finally 블록 내에 return이 있는 경우 try 블록 안의 return이 무시될 수 있다.
📌 try-with-resources로 리소스 자동 반납하기
위에서 살펴본 try-catch-finally의 여러가지 단점을 극복하고자 Java7부터 리소스를 자동으로 반납해주는 try-with-resources문법이 추가되었다.
AutoCloseable 인터페이스를 구현하고 있는 자원에 대해 try-with-resources를 적용할 수 있고, 이에 따라 코드가 유연해지고, 누락되는 예외없이 코드 작성이 가능해졌다.
import java.io.BufferedInputStream;
import java.io.FileInputStream;
import java.io.IOException;

public class Main {

	public static void main(String[] args) {
		try (
			FileInputStream is = new FileInputStream("file.txt");
			BufferedInputStream bis = new BufferedInputStream(is)
		) {
			int data = -1;
			while ((data = bis.read()) != -1) {
				System.out.print((char)data);
			}
		} catch (IOException e) {
			e.printStackTrace();
		}
	}

}
사용법은 매우 간단하다
try(...)안에 사용할 리소스를 1개 이상 선언한다. 여기에서 선언한 리소스들은 try 블록 내에서 사용 가능하고 try 블록을 벗어나면 자동으로close()를 호출해 리소스를 반납한다.- 사용자 정의 타입에서
try-with-resources구문을 적용하고 싶다면AutoCloseable을 상속받아야 한다.
import java.io.IOException;

public class Main {

	public static void main(String[] args) {
		try (
			MyReader myReader = new MyReader();
		) {
			myReader.doSomething();
		} catch (IOException e) {
			e.printStackTrace();
		}
	}

	static class MyReader implements AutoCloseable {

		public void doSomething() {
			System.out.println("This is MyReader... doSomething()");
		}

		@Override
		public void close() throws IOException {
			System.out.println("MyReader close");
		}

	}

}
This is MyReader... doSomething()
MyReader close
- 여러 리소스가 존재할 때는 Stack 형식으로 나중에 선언된 리소스들이 먼저 반납된다
import java.io.IOException;

public class Main {

	public static void main(String[] args) {
		try (
			MyReader myReader = new MyReader();
			OurReader ourReader = new OurReader()
		) {
			myReader.doSomething();
			ourReader.doSomething();
		} catch (IOException e) {
			e.printStackTrace();
		}
	}

	static class MyReader implements AutoCloseable {

		public void doSomething() {
			System.out.println("This is MyReader... doSomething()");
		}

		@Override
		public void close() throws IOException {
			System.out.println("MyReader close");
		}

	}

	static class OurReader implements AutoCloseable {

		public void doSomething() {
			System.out.println("This is OurReader... doSomething()");
		}

		@Override
		public void close() throws IOException {
			System.out.println("OurReader close");
		}

	}

}
This is MyReader... doSomething()
This is OurReader... doSomething()
OurReader close
MyReader close
📌 try-with-resources를 사용해야 하는 이유
1. 스택 트레이스에 누락되지 않는다
try-with-resources를 사용하면 예외가 스택 트레이스에 누락되는 상황이 발생하지 않는다
try-catch-finally를 이용하면 에러가 발생해도 스택 트레이스가 누락되는 경우가 발생할 수 있다.
public class Main {

	public static void main(String[] args) throws Exception {
		tryCatchFinally();
	}

	public static void tryCatchFinally() throws Exception {
		MyReader myReader = null;

		try {
			myReader = new MyReader();
			myReader.doSomething();
		} finally {
			if (myReader != null) {
				myReader.close();
			}
		}
	}

	static class MyReader implements AutoCloseable {

		public void doSomething() {
			System.out.println("MyReader do something...");
			throw new IllegalStateException();
		}

		@Override
		public void close() throws Exception {
			System.out.println("MyReader close");
			throw new IllegalStateException();
		}

	}

}
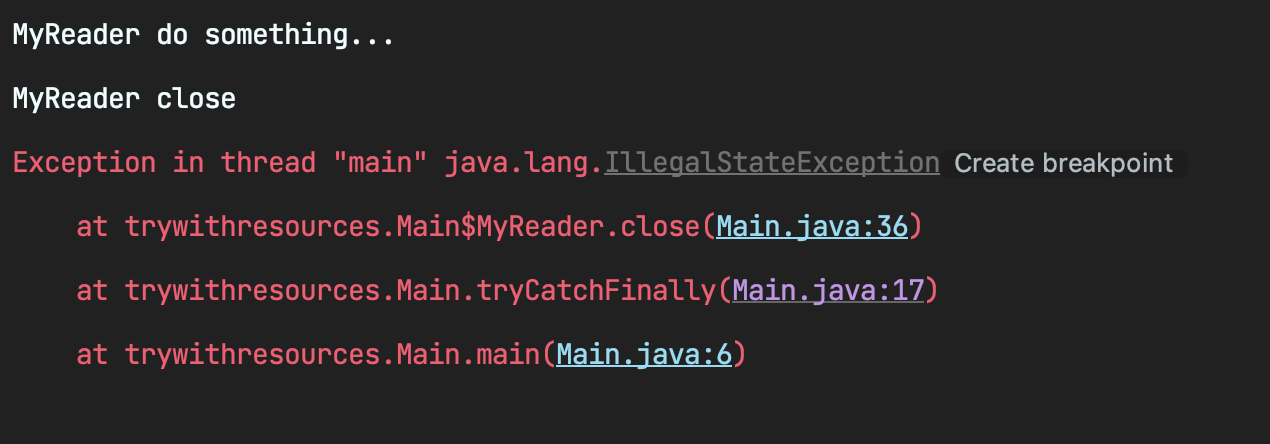
에러 트레이스가 doSomething() 호출 시에서 찍힌 부분은 누락되고, close() 호출 시에 찍힌 부분만 남는다. 만약 서비스 운영 중 비즈니스 로직에서 예외가 터진 상황이라면 어디서 예외가 터졌는지 로그를 통해 확인할 수 없고 엄청난 비용이 투입되어 예외가 터진 곳을 찾는 상황이 발생할 수 있다.
이제 try-with-resources를 확인해본다
public class Main {

	public static void main(String[] args) throws Exception {
		tryWithResources();
	}

	public static void tryWithResources() throws Exception {
		try (MyReader myReader = new MyReader()) {
			myReader.doSomething();
		}
	}

	static class MyReader implements AutoCloseable {

		public void doSomething() {
			System.out.println("MyReader do something...");
			throw new IllegalStateException();
		}

		@Override
		public void close() throws Exception {
			System.out.println("MyReader close");
			throw new IllegalStateException();
		}

	}

}
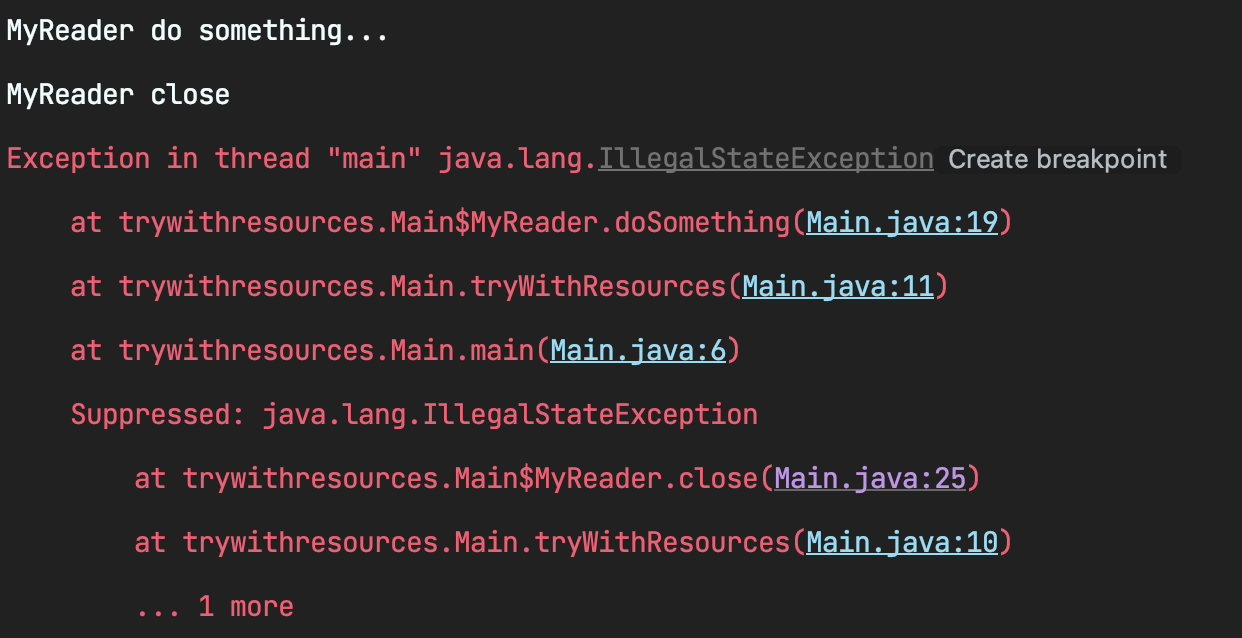
스택 트레이스에 두 메서드 모두 로그가 남는다.
실무에서는 예외가 터지면 로그를 통해 해결을 해야하는데 스택 트레이스에 누락되는 상황을 막기 위해서는 try-with-resources를 사용해야 한다
2. 예외가 터져 자원을 반납하지 못하는 상황이 발생하지 않는다
try-with-resources는 누락 없이 모든 리소스를 자동으로 반납할 수 있다.
try-catch-finally를 이용하는 경우 리소스 반납이 누락되는 경우가 발생할 수 있다.
public class Main {

	public static void main(String[] args) throws Exception {
		MyReader reader1 = null;
		MyReader reader2 = null;
		MyReader reader3 = null;

		try {
			reader1 = new MyReader();
			reader2 = new MyReader();
			reader3 = new MyReader();

			reader1.doSomething();
			reader2.doSomething();
			reader3.doSomething();
		} finally {
			if (reader1 != null) {
				reader1.close();
			}
			if (reader2 != null) {
				reader2.close();
			}
			if (reader3 != null) {
				reader3.close();
			}
		}
	}

	static class MyReader implements AutoCloseable {

		public void doSomething() {
			System.out.println("MyReader do something...");
		}

		@Override
		public void close() throws Exception {
			System.out.println("MyReader close");
			throw new IllegalStateException();
		}

	}

}
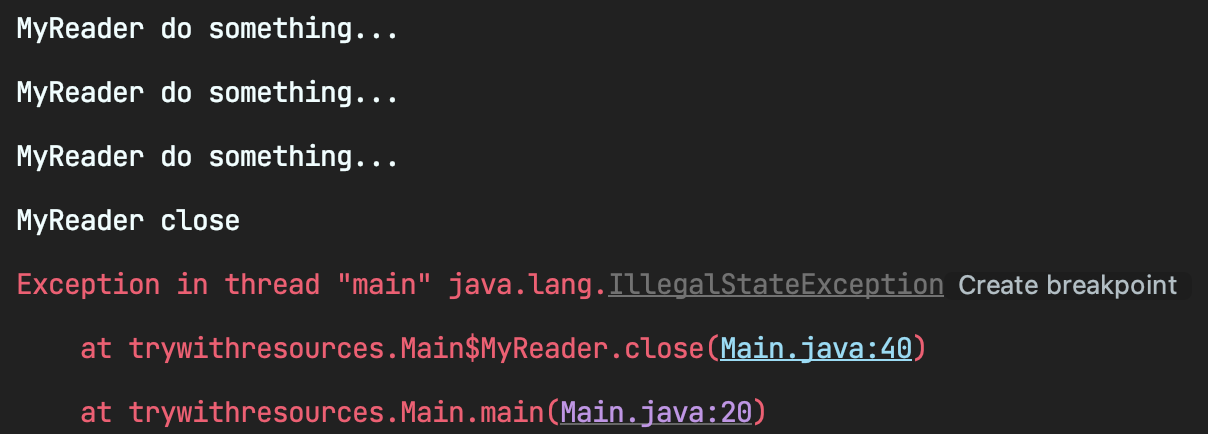
총 3개의 리소스를 사용해 3개의 리소스 반납이 이루어져야 하지만 1개의 리소스만 반납되었다. 1개의 리소스가 반납되고 IllegalStateException 이 터져 이 예외를 잡을 catch 구문이 없어 모든 리소스가 반납되지 못했다. 이런 상황을 해결하기 위해서는 catch 구문을 통해 모든 리소스가 반납되도록 만들어야 하는데 이는 코드를 더욱 복잡하게 만든다.
try-with-resources를 사용하면 catch 구문의 걱정 없이 모든 리소스를 간편하게 반납할 수 있다.
public class Main {

	public static void main(String[] args) throws Exception {
		try (
			MyReader reader1 = new MyReader();
			MyReader reader2 = new MyReader();
			MyReader reader3 = new MyReader();
		) {
			reader1.doSomething();
			reader2.doSomething();
			reader3.doSomething();
		}
	}

	static class MyReader implements AutoCloseable {

		public void doSomething() {
			System.out.println("MyReader do something...");
		}

		@Override
		public void close() throws Exception {
			System.out.println("MyReader close");
			throw new IllegalStateException();
		}

	}

}
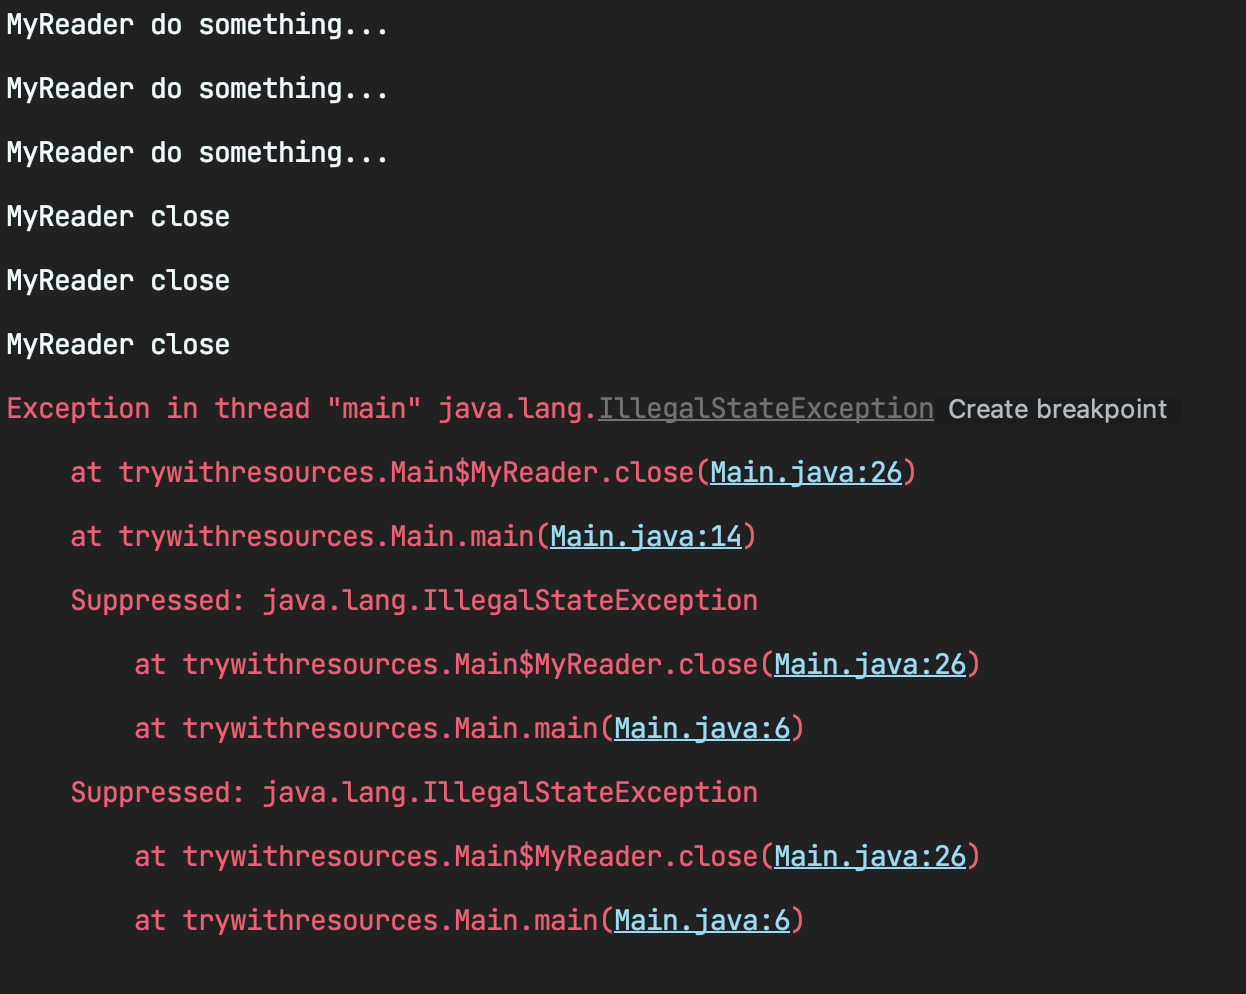
결과를 보면 모든 리소스가 정상적으로 반납 되었고 스택 트레이스에도 누락 없이 로그가 남는 것을 확인할 수 있다.
소스 파일이 컴파일 될 때 try-with-resources에서 누락없이 모든 경우를 try-catch-finally로 변환해주기 때문에 복잡한 구현은 컴파일러에게 넘기고 편하게 자원을 반납할 수 있다.
📌 정리
try-catch-finally대신 try-with-resources를 사용하자!!!
try-with-resources 구문의 장점을 간략하게 적어보면 다음과 같다
- 자동 리소스 해제
- 예외 처리 간결화
- 훨씬 간결하고 번거로운 리소스 반납 작업을 컴파일러가 대신 해준다
- 다중 리소스 관리
- 리소스 종료 순서 보장
- Stack 형식으로 나중에 선언된 리소스 먼저 반납된다
- 개발자의 실수 커버
- 실수로 자원을 반납하지 못하거나, 예외가 터져 자원을 반납하지 못하는 상황을 방지할 수 있다
- 예외가 스택 트레이스에 누락되지 않는다
댓글남기기